TryGit
目录
- 安装git
- 创建ssh key、配置git
- 提交本地项目到GitHub
一、安装Git
MAC 上安装Git主要有两种方式
首先查看电脑是否安装Git,终端输入:
git
安装过则会输出:
1 | WMBdeMacBook-Pro:~ WENBO$ git |
1、通过homebrew安装Git
- 1、未安装homebrew,需安装homebrew
1
/usr/bin/ruby -e "$(curl -fsSL https://raw.githubusercontent.com/Homebrew/install/master/install)"
- 2、安装git
1
brew install git
2、通过Xcode安装
直接从AppStore安装Xcode,Xcode集成了Git,不过默认没有安装,你需要运行Xcode,选择菜单“Xcode”->“Preferences”,在弹出窗口中找到“Downloads”,选择“Command Line Tools”,点“Install”就可以完成安装了。
二、创建ssh key、配置git
1、设置username和email(github每次commit都会记录他们)
1
2
git config --global user.name "wenbo"
git config --global user.email "1050794513@qq.com"2、通过终端命令创建ssh key
1
ssh-keygen -t rsa -C "105***513@qq.com"
1050***13@qq.com是我的邮件名,回车会有以下输出1
2
3
4
5
6
7Last login: Sat Jan 6 14:12:16 on ttys000
WMBdeMacBook-Pro:~ WENBO$ ssh-keygen -t rsa -C "1050794513@qq.com"
Generating public/private rsa key pair.
Enter file in which to save the key (/Users/WENBO/.ssh/id_rsa):
/Users/WENBO/.ssh/id_rsa already exists.
Overwrite (y/n)? n
WMBdeMacBook-Pro:~ WENBO$由于这里我原来已经创建过,这里我选n,没有创建过的,会要求确认路径和输入密码,我们这使用默认的一路回车就行。成功的话会在~/下生成.ssh文件夹,进去,打开id_rsa.pub,复制里面的key。
终端查看.ssh/id_rsa.pub文件1
open .ssh/id_rsa.pub
回车后,就会新弹出一个终端,然后复制里面的key。
或者用cat命令查看1
cat .ssh/id_rsa.pub
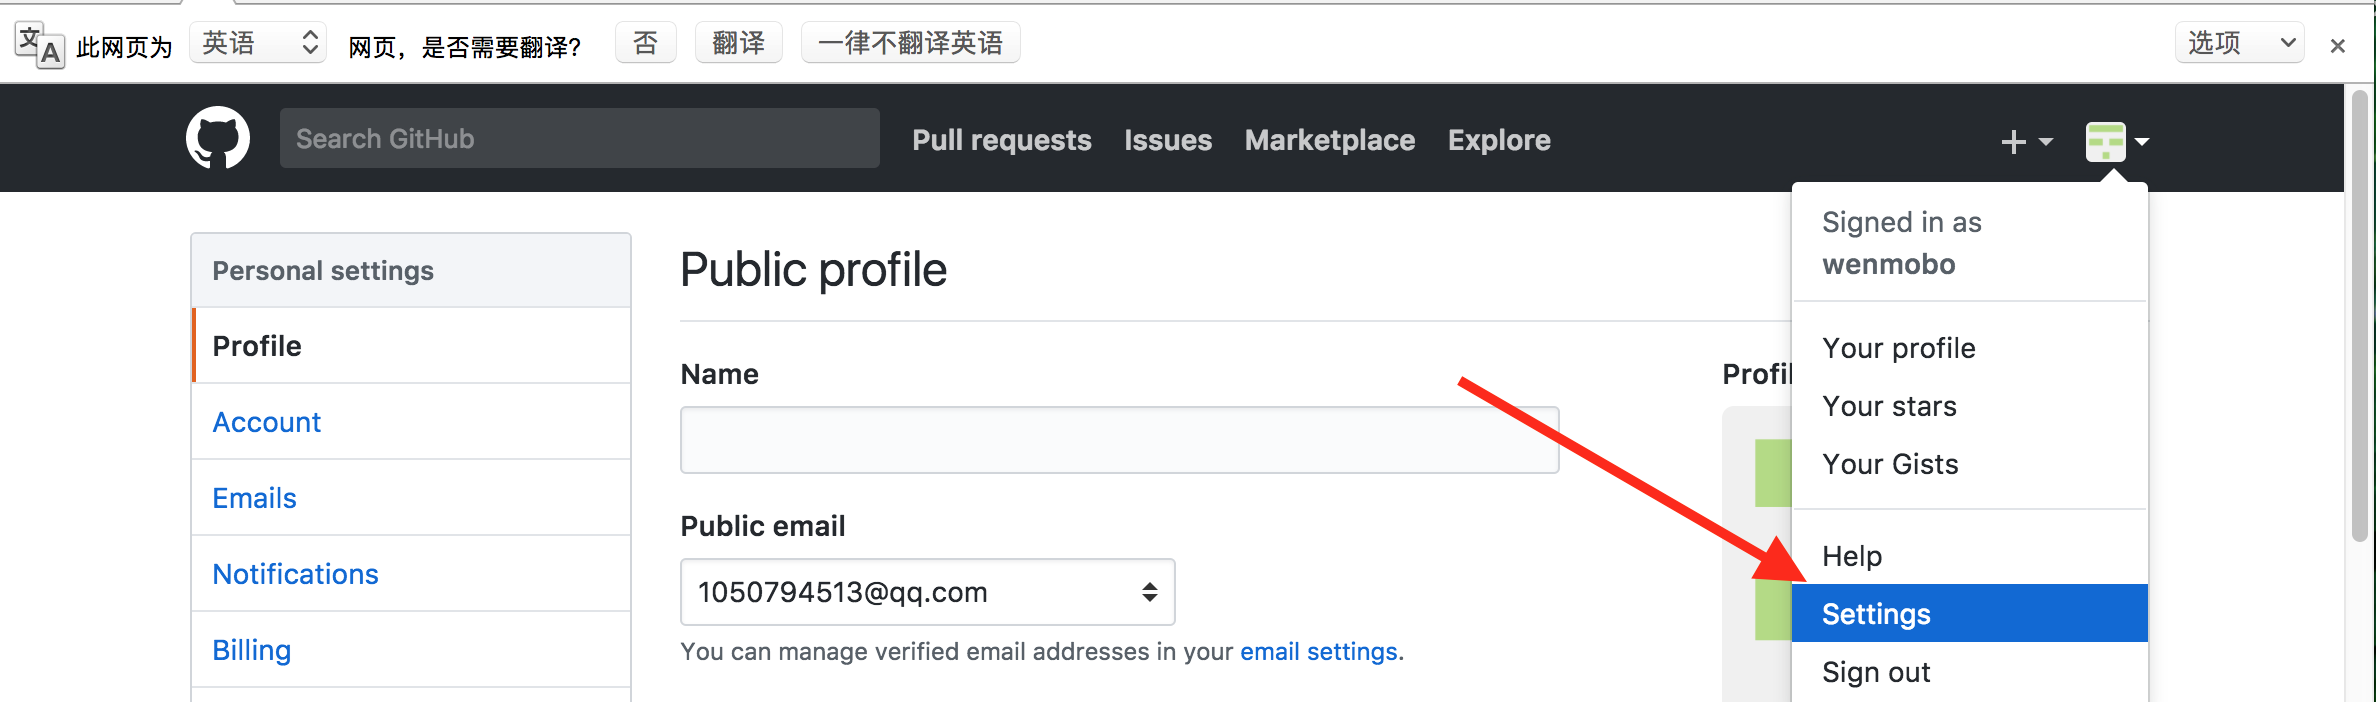
3、登录GitHub(默认你已经注册了GitHub账号),添加ssh key,点击Settings,如图
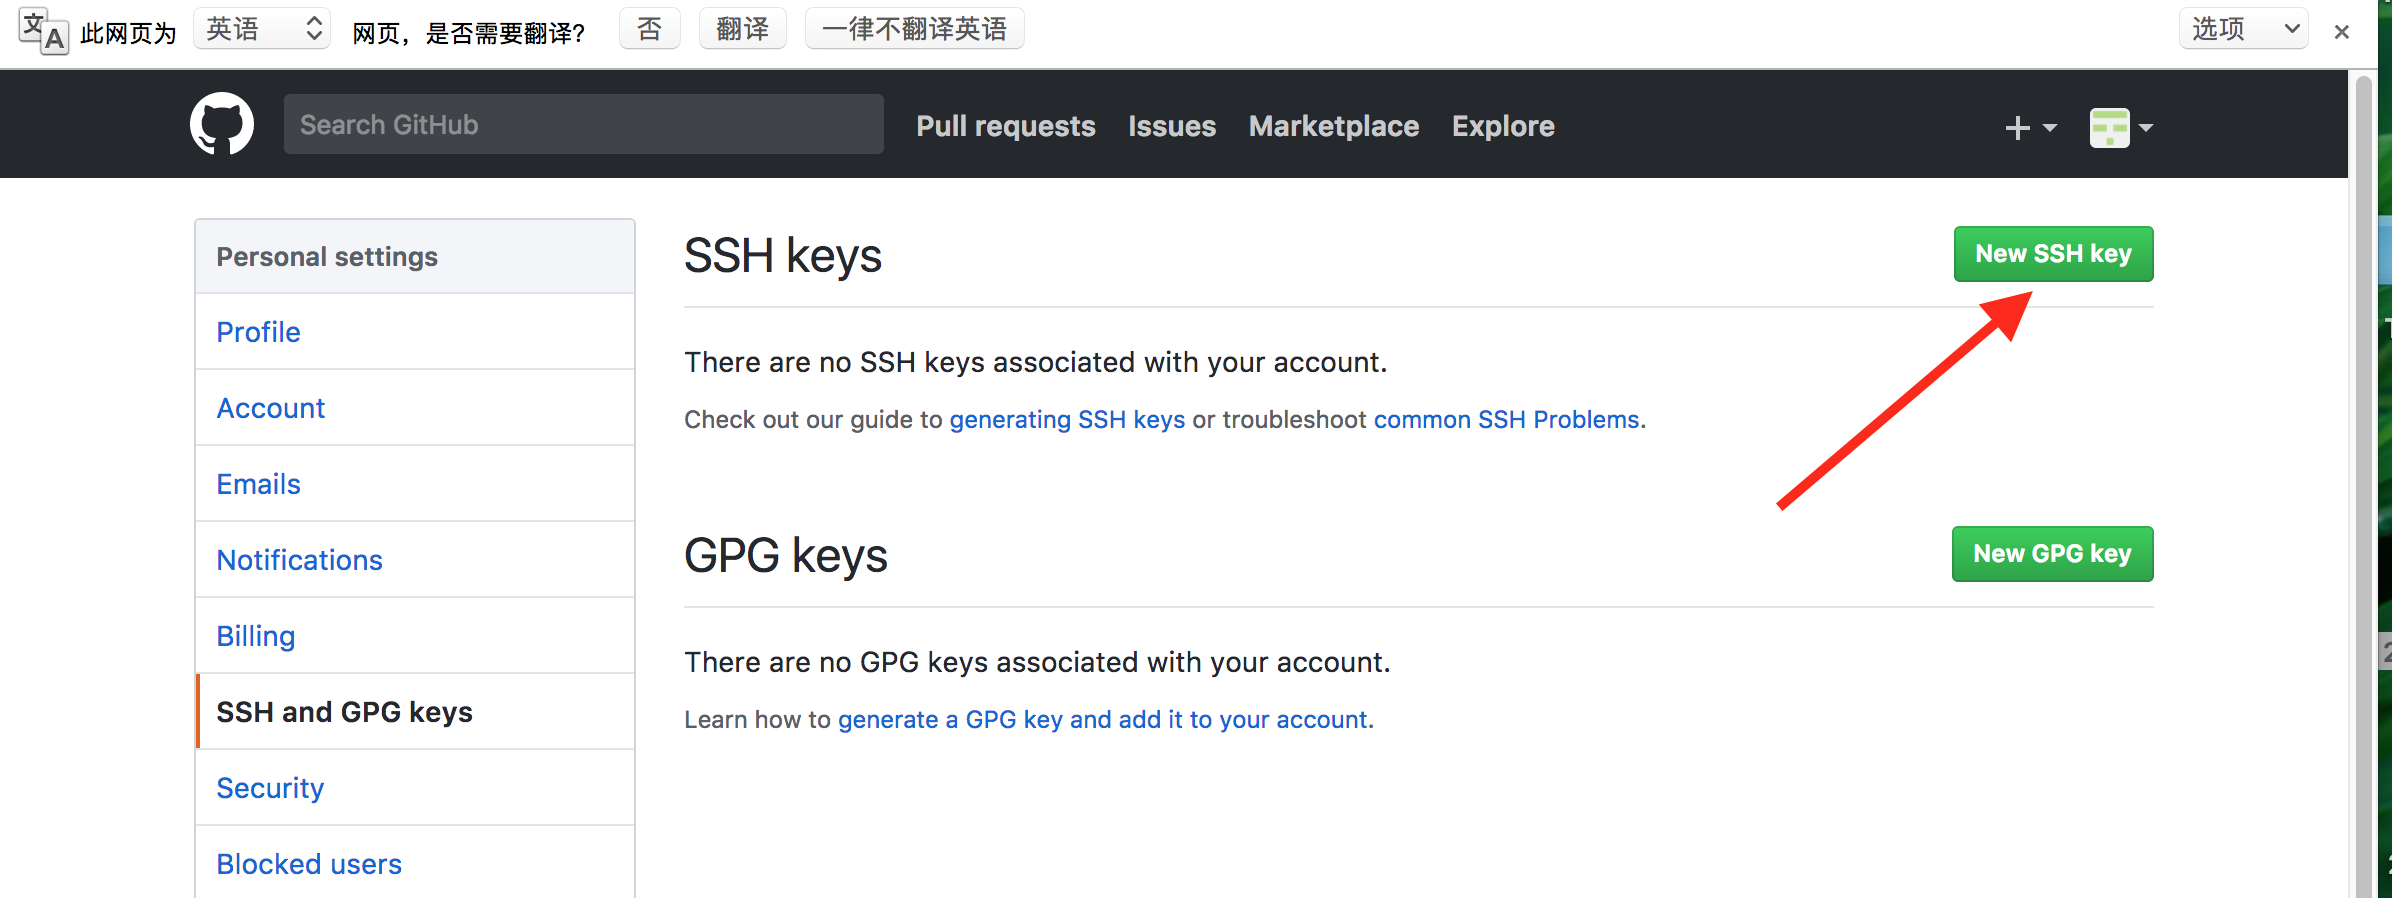
点击New SSH key,如图
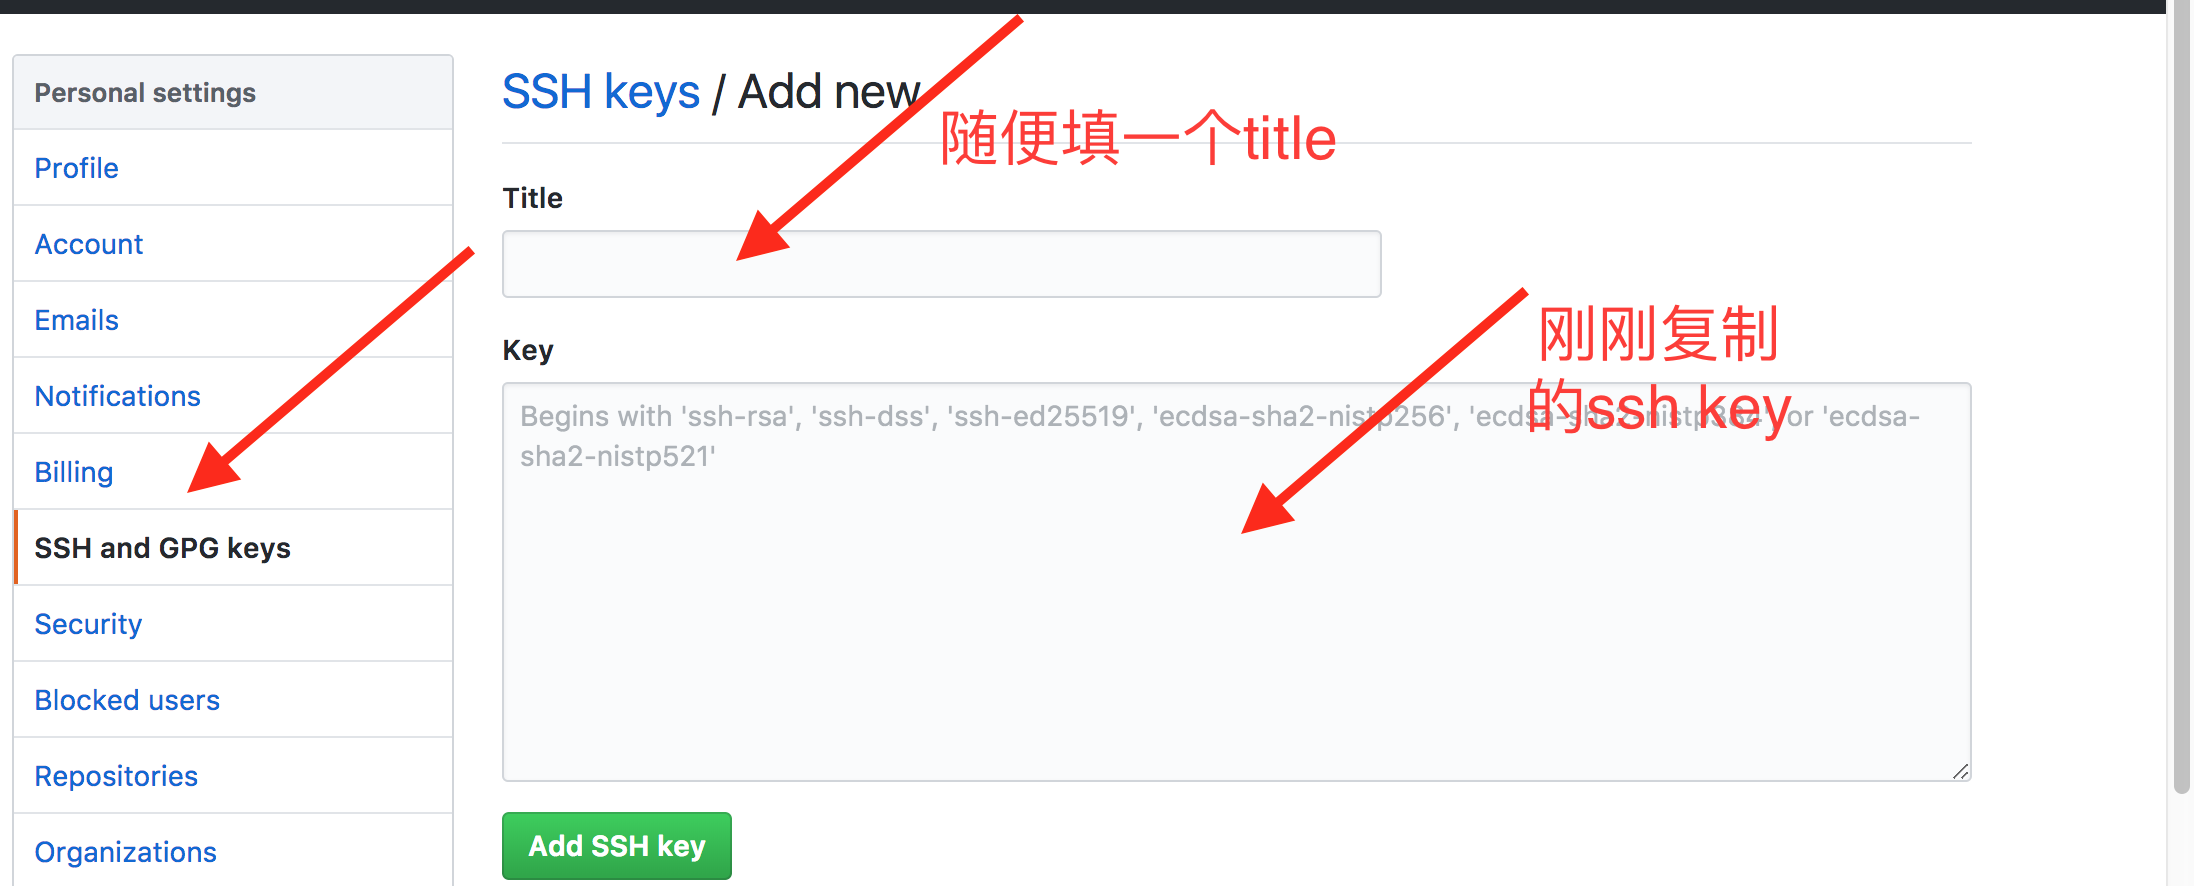
添加key,如图
4、链接验证
1
ssh -T git@github.com
终端输出结果
1
2
3
4Last login: Sat Jan 6 14:42:55 on ttys000
WMBdeMacBook-Pro:~ WENBO$ ssh -T git@github.com
Hi wenmobo! You've successfully authenticated, but GitHub does not provide shell access.
WMBdeMacBook-Pro:~ WENBO$说明已经链接成功。
三、提交本地项目到GitHub
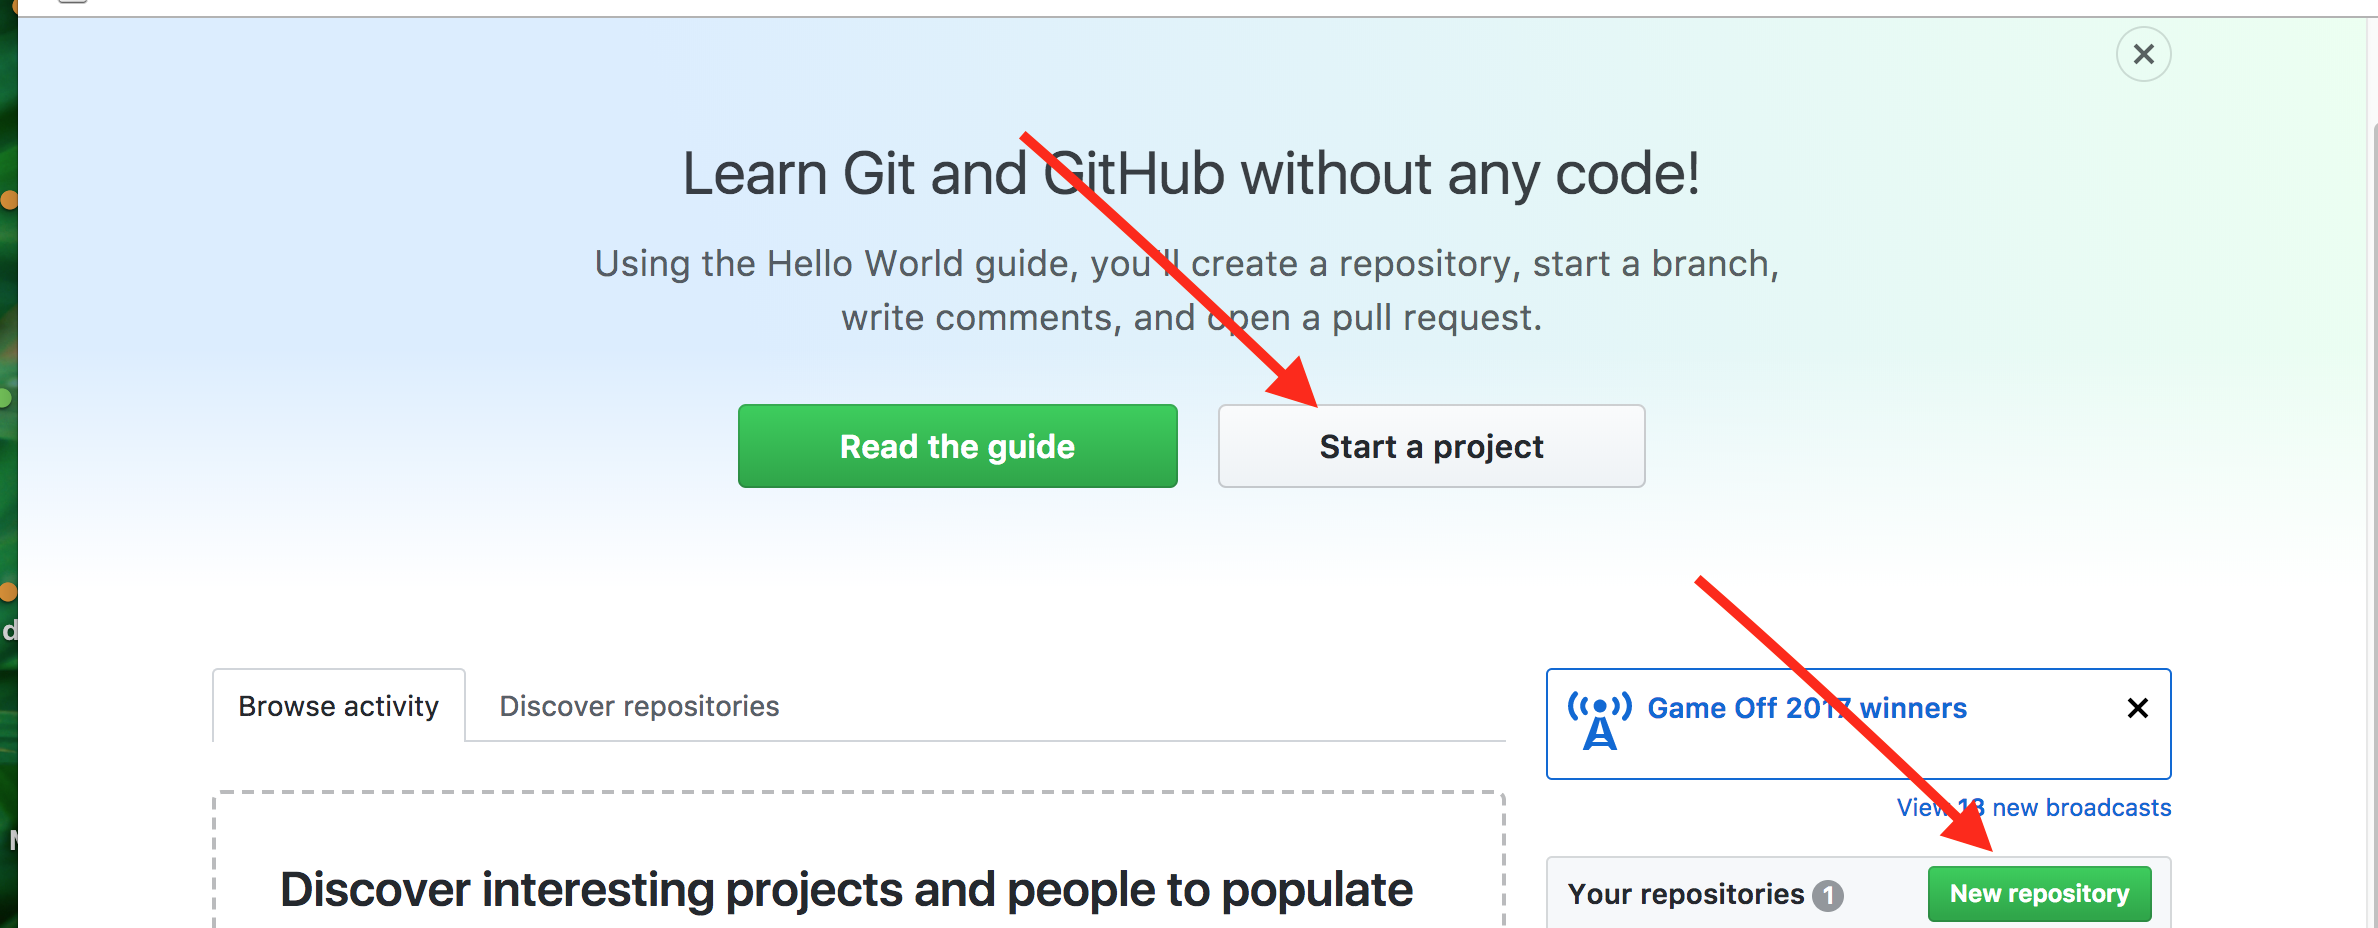
1、在GitHub上新创建一个 repository或者Start a Project,如图:
2、填写项目信息,如下图所示:
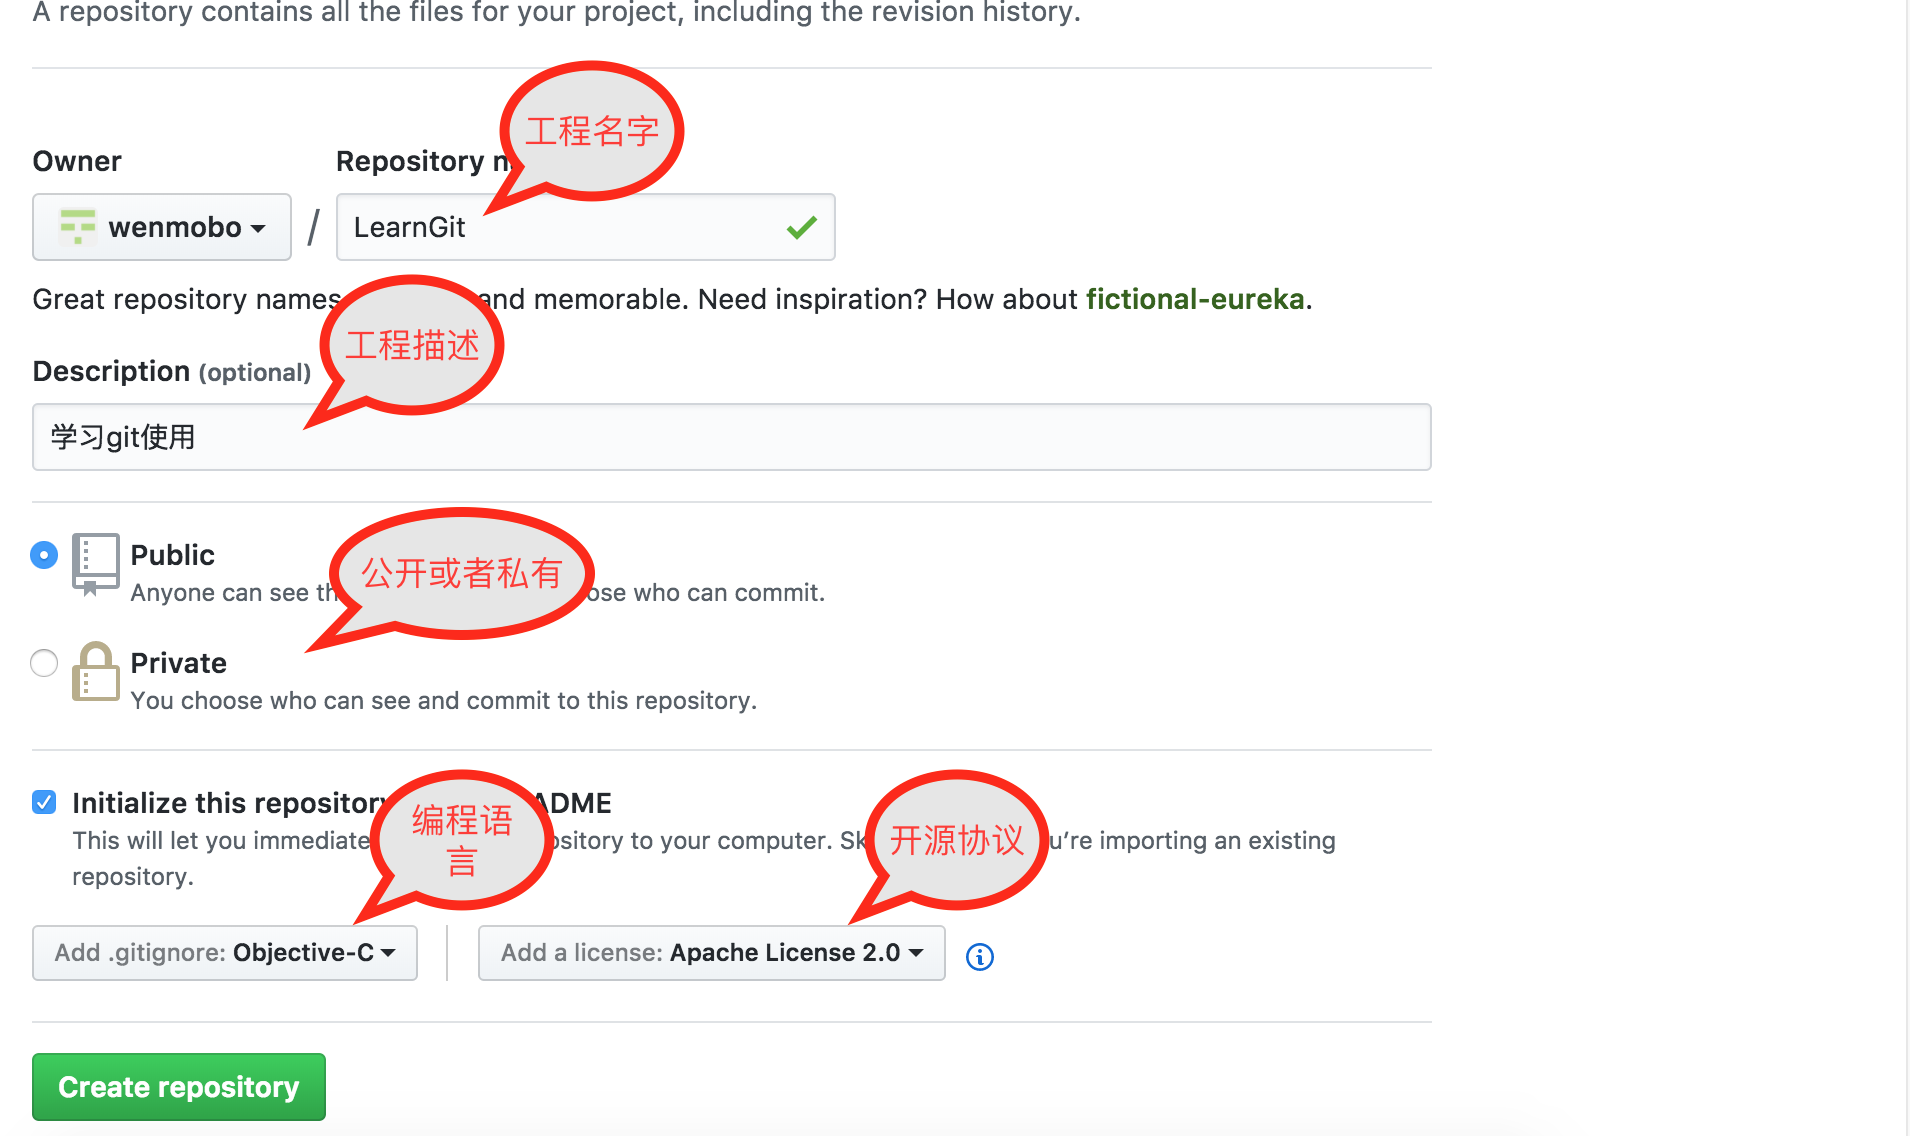
点击Create repository,就创好一个工程了。
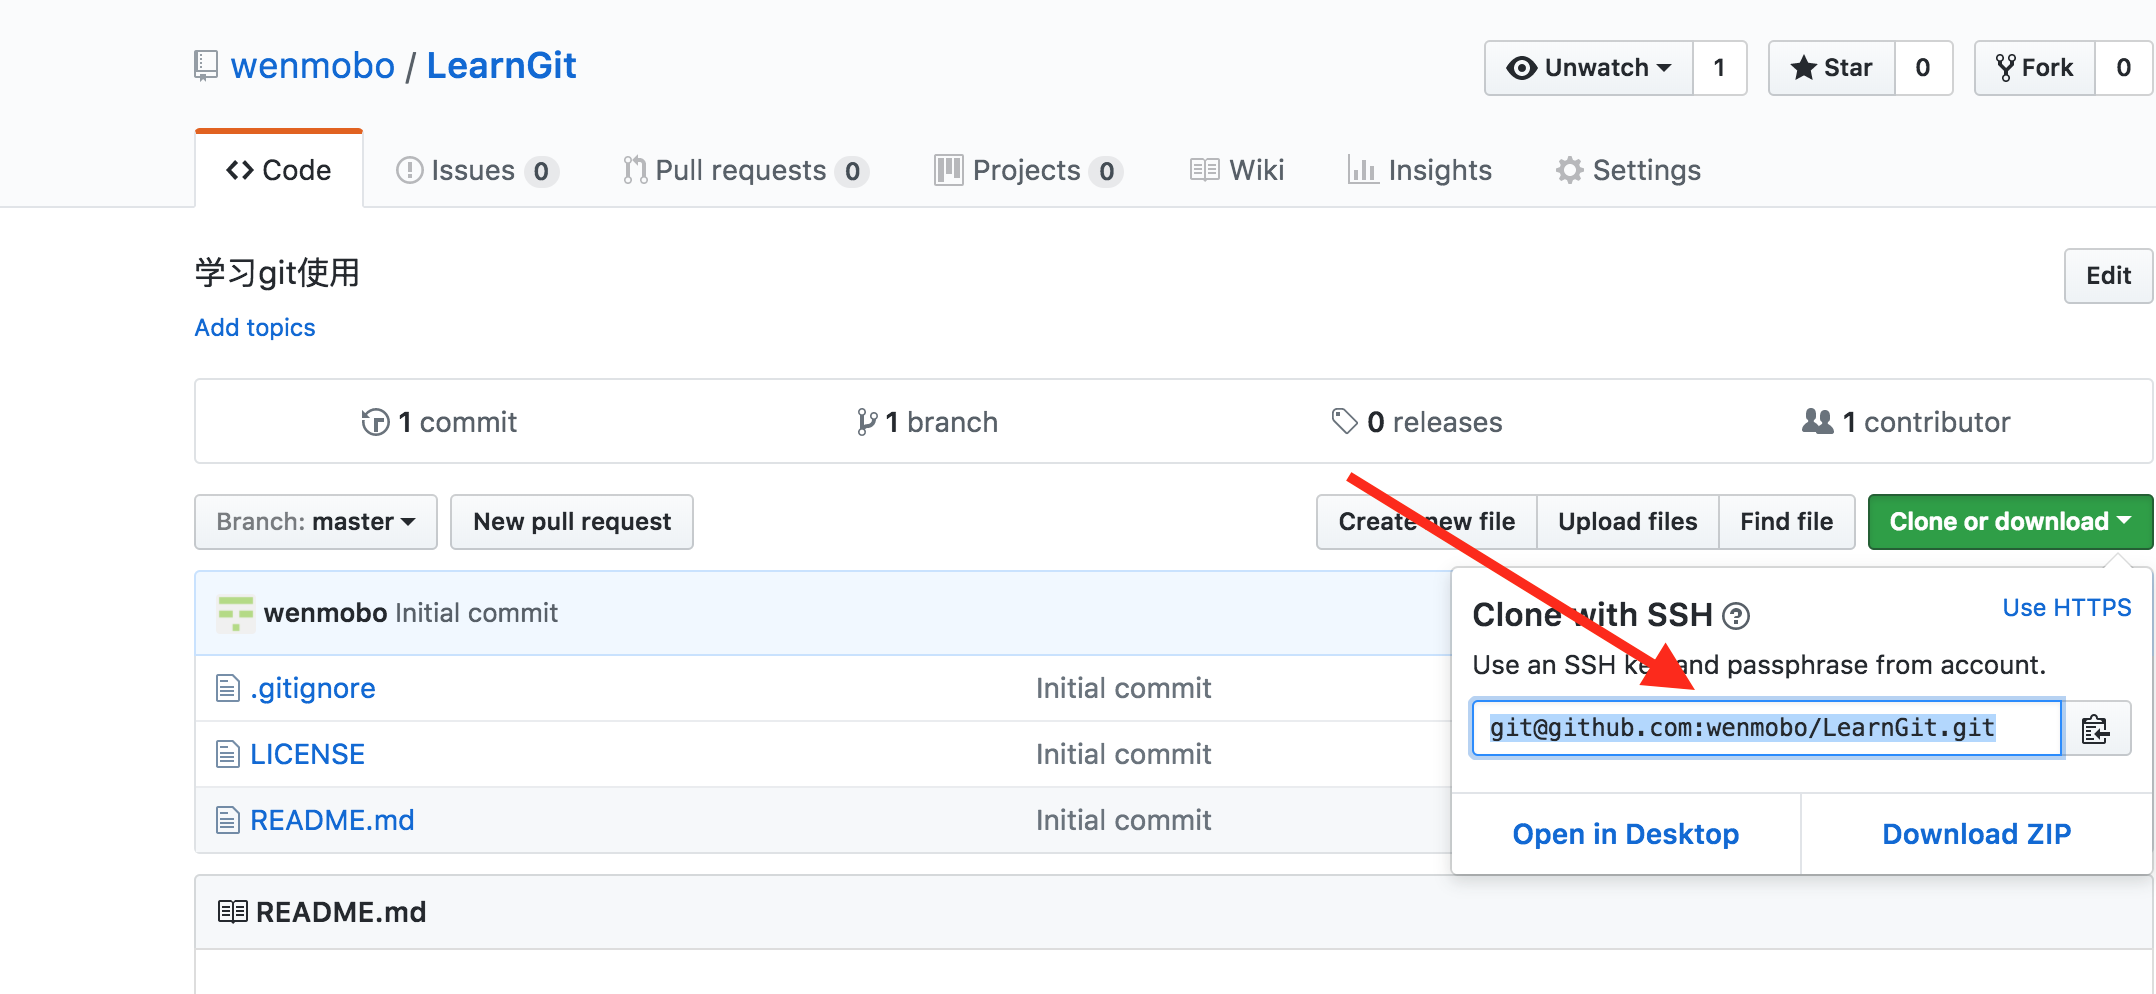
3、Clone工程到本地,首先复制ssh 地址
打开终端,这里只是测试,我想把工程克隆在桌面,首先在终端中切换路径到桌面,输入以下命令:1
cd /Users/WENBO/Desktop/
然后克隆项目,终端输入
1
git clone git@github.com:wenmobo/LearnGit.git
git@github.com:wenmobo/LearnGit.git是刚刚复制的ssh路径。
终端完整输出如下:1
2
3
4
5
6
7
8Last login: Sat Jan 6 15:17:17 on ttys000
WMBdeMacBook-Pro:~ WENBO$ cd /Users/WENBO/Desktop/
WMBdeMacBook-Pro:Desktop WENBO$ git clone git@github.com:wenmobo/LearnGit.git
Cloning into 'LearnGit'...
remote: Counting objects: 5, done.
remote: Compressing objects: 100% (4/4), done.
remote: Total 5 (delta 0), reused 0 (delta 0), pack-reused 0
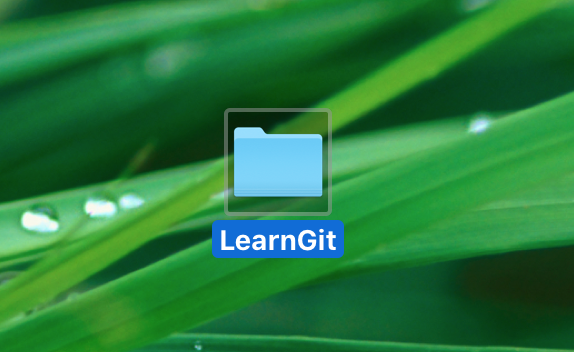
Receiving objects: 100% (5/5), 5.2这时,工程已经被克隆到桌面了,如下图:
4、在Xcode中新创建一个工程,保存的路径为刚刚克隆下来的LearnGit文件夹下,如下图所示:

5、提交修改,首先切换到LearnGit文件路径:
1
cd /Users/WENBO/Desktop/LearnGit
然后输入:
1
2
3
4
5
6//文件添加到仓库(.代表提交所有文件)
git add .
//把文件提交到仓库
git commit -m "First Commit"
//上传到github
git push终端完整输出如下:
1
2
3
4
5
6
7
8
9
10
11
12
13
14
15
16
17
18
19
20
21
22
23
24
25
26
27
28Last login: Sat Jan 6 15:49:54 on ttys000
WMBdeMacBook-Pro:~ WENBO$ cd /Users/WENBO/Desktop/LearnGit
WMBdeMacBook-Pro:LearnGit WENBO$ git add .
WMBdeMacBook-Pro:LearnGit WENBO$ git commit -m "First Commit"
[master ae3bbe9] First Commit
11 files changed, 649 insertions(+)
create mode 100644 LearnGitDemo/LearnGitDemo.xcodeproj/project.pbxproj
create mode 100644 LearnGitDemo/LearnGitDemo.xcodeproj/project.xcworkspace/contents.xcworkspacedata
create mode 100644 LearnGitDemo/LearnGitDemo/AppDelegate.h
create mode 100644 LearnGitDemo/LearnGitDemo/AppDelegate.m
create mode 100644 LearnGitDemo/LearnGitDemo/Assets.xcassets/AppIcon.appiconset/Contents.json
create mode 100644 LearnGitDemo/LearnGitDemo/Base.lproj/LaunchScreen.storyboard
create mode 100644 LearnGitDemo/LearnGitDemo/Base.lproj/Main.storyboard
create mode 100644 LearnGitDemo/LearnGitDemo/Info.plist
create mode 100644 LearnGitDemo/LearnGitDemo/ViewController.h
create mode 100644 LearnGitDemo/LearnGitDemo/ViewController.m
create mode 100644 LearnGitDemo/LearnGitDemo/main.m
WMBdeMacBook-Pro:LearnGit WENBO$ git push
Warning: Permanently added the RSA host key for IP address '192.30.255.112' to the list of known hosts.
Counting objects: 20, done.
Delta compression using up to 4 threads.
Compressing objects: 100% (18/18), done.
Writing objects: 100% (20/20), 6.80 KiB | 0 bytes/s, done.
Total 20 (delta 2), reused 0 (delta 0)
remote: Resolving deltas: 100% (2/2), done.
To github.com:wenmobo/LearnGit.git
1000218..ae3bbe9 master -> master
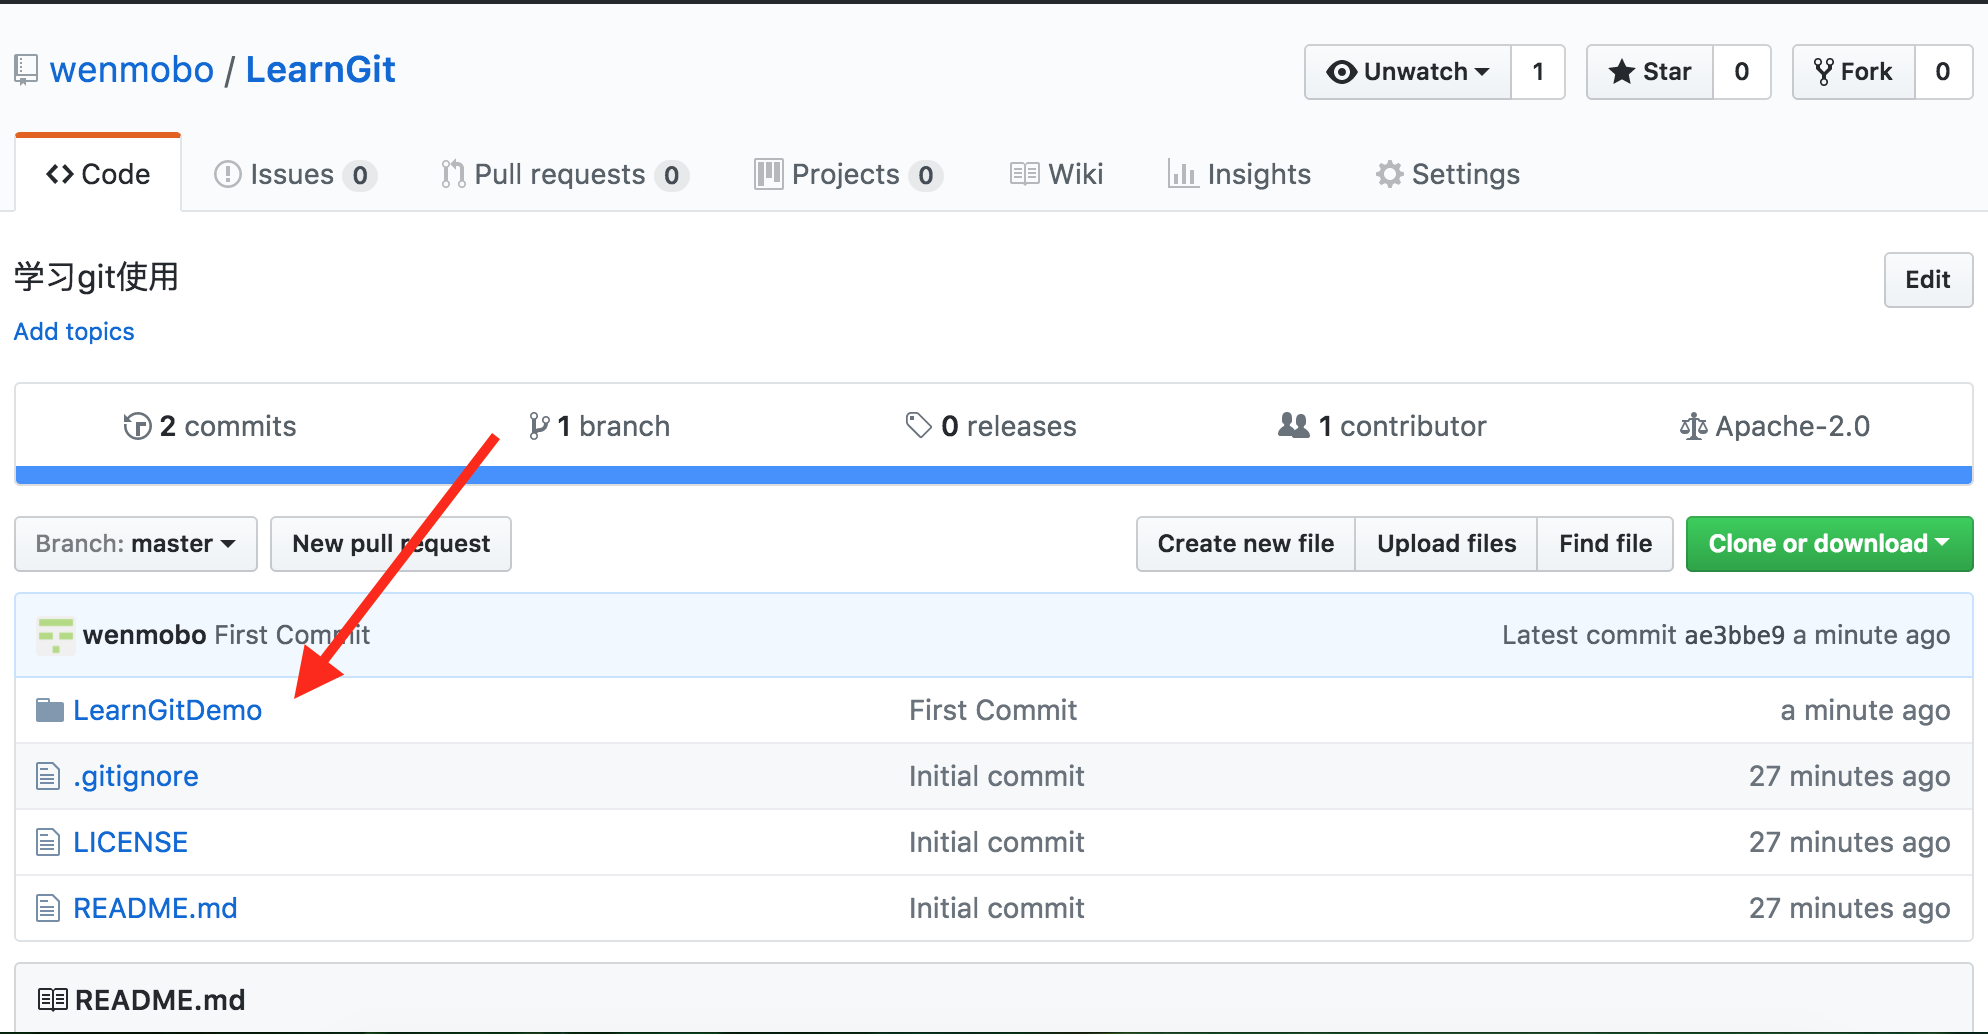
WMBdeMacBook-Pro:LearnGit WENBO$查看GitHub上的项目,LearnGit已经上传成功啦,如下图所示:
总结
自己现在公司项目都是用SVN托管的,没有用Git托管。用到Git的地方就是用码云托管自己写的小Demo,我也是通过这篇文章了解下上传项目到GitHub的基本流程,和码云上传其实也没多大的区别,码云上传我没有用终端,而是用的SourceTree,Git图形化工具还是挺多的,可以自己去了解与使用吧。文章中所写的也是一些最基本的使用,还是多多了解下吧,万一以后的公司要用呢,哈哈。
参考文章

